

The Zoom H1n is great recorder for audio recording face-to-face interviews. One of the great features of the H1n is that it can automatically add the date and time to each recording file, which can help you organize and manage your recordings. Additionally, the time and date is shown in the playback screen if you click on LOCUT button.
However, sometimes you may want to change the date/time on the H1n Recorder, either because it is incorrect or because you want to use a different date format. Changing the date/time on your Zoom H1n recorder is very easy and only takes a few steps. Let’s get started!
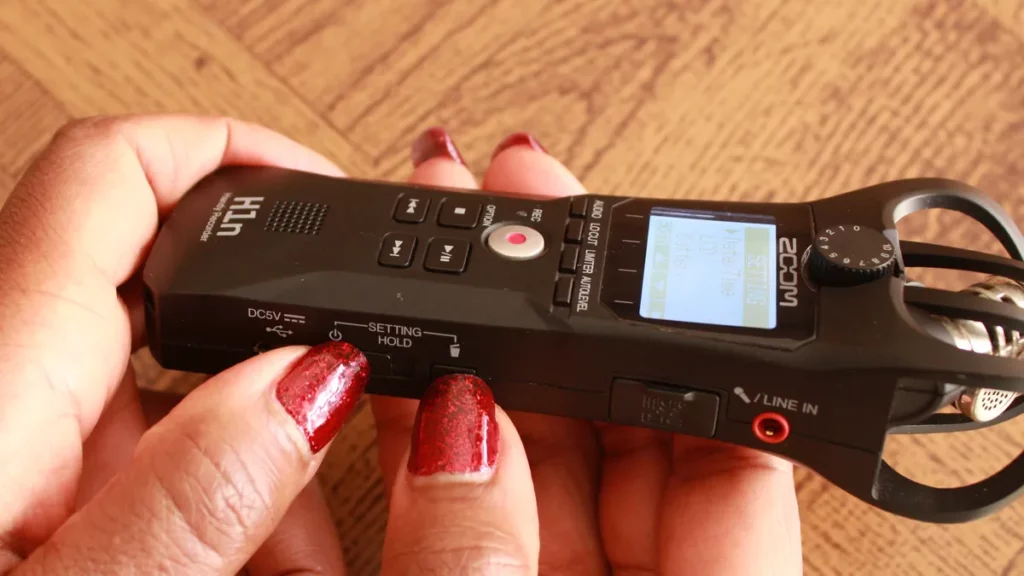
Step 1: Hold Delete Button and Turn ON the Zoom H1n Recorder

First, if your recorder is powered on, switch it OFF by holding down the power button. Then, while holding the delete button, turn on the H1n Recorder by sliding the power switch on the right side of the device. Don’t let go of the delete button until the recorder switches on and loads the SETTING menu.
Step 2: Open the Date and Time Menu
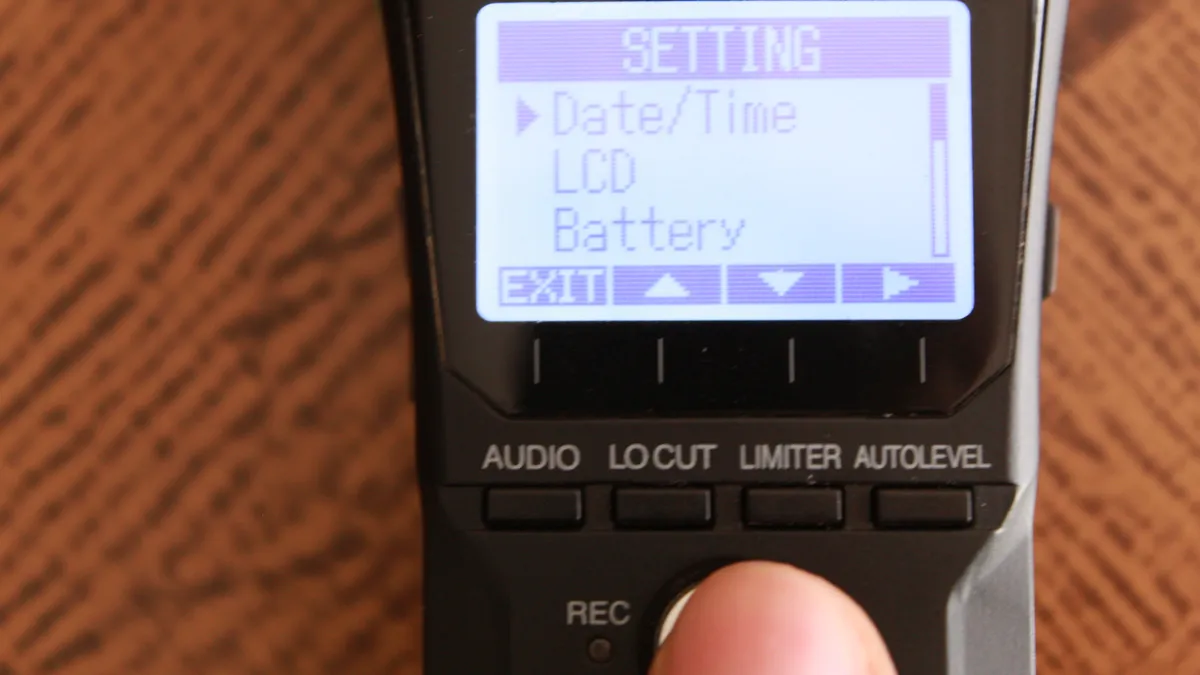
Your Zoom H1n will turn on and automatically open the SETTING Menu. Press the record button to enter the Date/Time Menu.
Step 3: Change Date Format
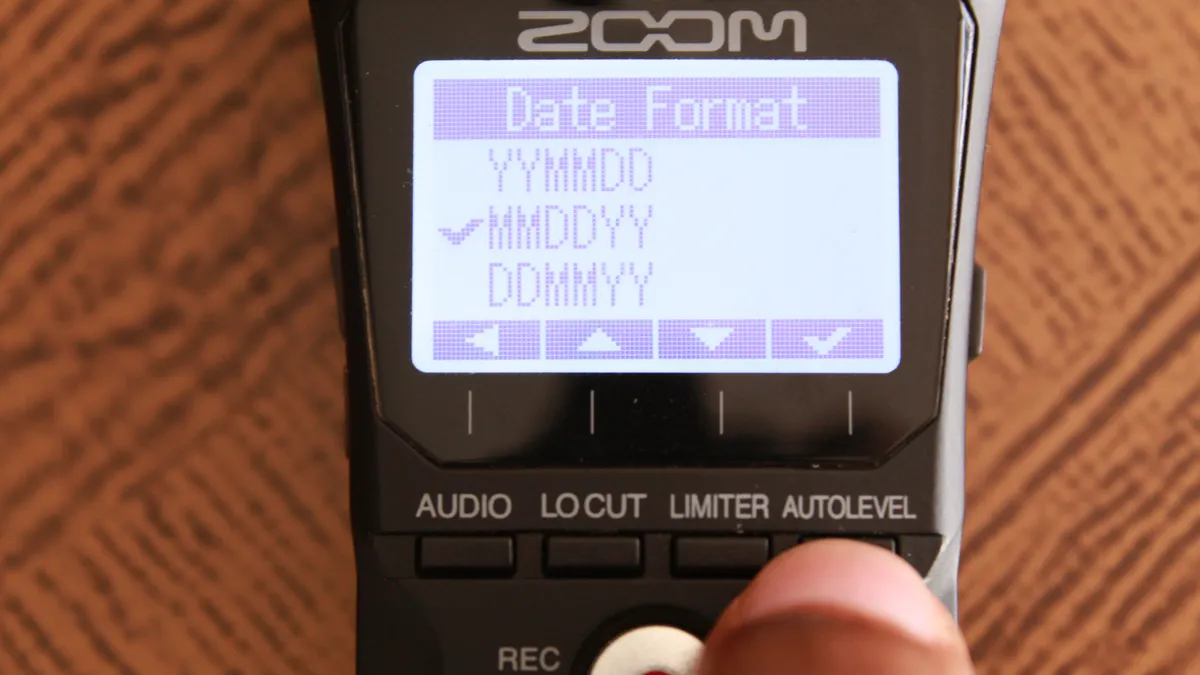
If you wish to change the Date Format, from the default YYMMDD, press the LIMITER/Down button to select the Date Format menu. Then press the Record button to enter the Date Format menu. You have the choice of using the default YYMMDD date format or the MMDDYY/DDMMYY. Use the LOCUT/LIMITER buttons to select the date format you wish to use. Then, press the AUTOLEVEL button to set your selection and go back to the Date/Time menu.
Step 4: Set Date and Time
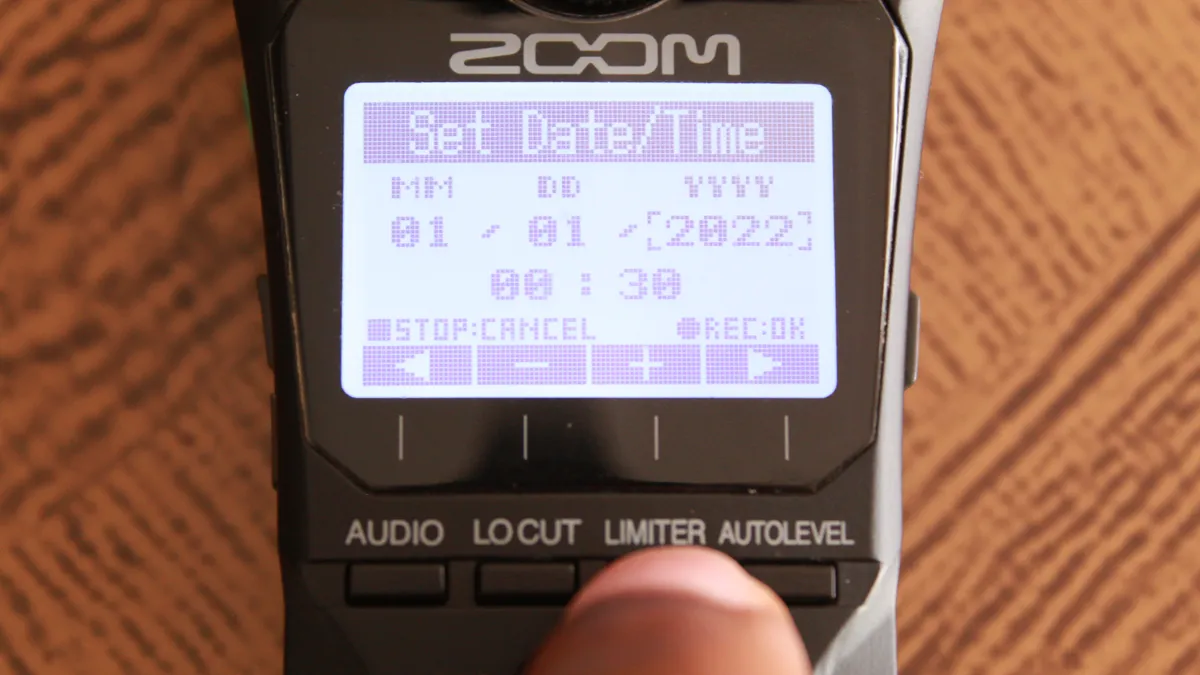
Press the LOCUT or the LIMITER button to select the Set Date/Time menu. Then press the Record button to enter the Set Date/Time menu. Use the AUDIO (back) and AUTOLEVEL (forward) buttons to move the cursor and select the year-YYYY, month-MM, day-DD, hour and minute. Then use the LOCUT button to decrease and the LIMITER button to increase the value selected by the cursor. Keep in mind the Zoom H1n recorder uses the 24 hour time format.
Step 5: Save your Settings

Press the Record button to save your settings and exit the Set Date/Time menu. Alternatively, you can press the OPTION (Stop) button to discard your changes and return to Set Date/Time menu. Press the AUDIO (back) button to go back to the SETTING menu. Then Press the AUDIO (EXIT) again to exit the SETTING menu.
And that’s it.
Now, whenever you remove the batteries from your Zoom H1n recorder, the time and date are reset. Luckily, the next time you switch on the Zoom H1n, it will automatically boot up into the SETTING menu and give you the option to set the date and time.
I hope you found this post on how to change the date and time on your Zoom H1n recorder helpful and informative. If you have any questions or comments, please feel free to leave them in the comments section below. Thank you for reading my blog and stay tuned to more tips and tricks on how to use your Zoom H1n Recorder!