

Monitoring your research interviews recording enables you to take the quality of your research interviews audio recording from meh to excellent. The Sony ICD-ux560 offers you two ways to monitor the sound quality of your research interviews; dB meters and the line out headphone jack. In this post I’m going to show you how to use both to greatly increase the sound quality of your research interviews.
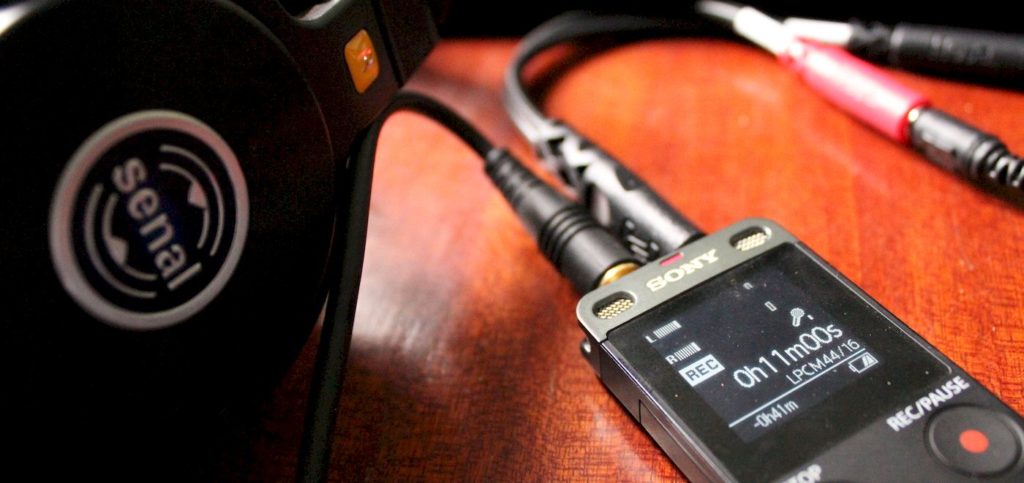
But first, a few caveats. This post is going to focus on using the Sony ICD-ux560, and the Giant Squid lavalier microphones and the Hosa splitter, because that’s the setup I recommend for recording interviews in a noisy location. Truth be told, if you are recording in a quiet location, you can get away with not monitoring the sound quality of your interviews. It would help increase the quality of the recorded audio, but you can get away with a lot.
However, if you are recording your interviews in a noisy location, monitoring the sound quality is a must. I’d recommend you spend at least a couple of minutes at the beginning of your interviews to monitor and optimize the sound quality. And please, before you conduct your first interview, play around with the ux560 and your microphones, do a test recording and follow the tips below to try and optimize for sound quality. Nothing beats hands-on experience, and while monitoring your interviews might seem daunting the first time you try it, with practice it will become second nature to you.
Using dB meters
So, let’s first start with the meters. The ux560 has two meters, for the left and right microphone, that show you an approximate dB level. dB levels are a good measure of the loudness of an audio recording and since the dB is a negative scale, the lower the number, the louder the sound. And that’s the primary use the dB meters; you use them to check the loudness of your recording.
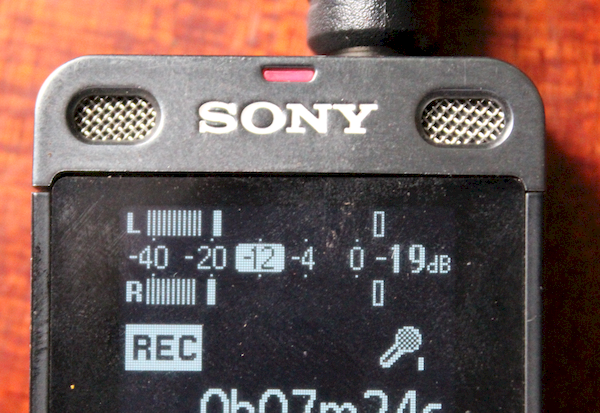
What dB should you aim for? Sony recommends that you want to aim for the recording level to stay around -12 dB. And that’s a solid suggestion. But I’d add you’ll want to also make sure that loud sounds to do not peak above -4 dB. Now, if you have an interviewee that has a lot of range in their voice; loud and quiet, then you might want to give them a lot more headroom and aim for the recording levels to stay around -18 dB.
When you are using 2 microphones, you’ll need to note which microphone is recording on the left and right channels. My default is to always use the left channel for me, the interviewer, and the right channel for the interviewee. The Hosa splitter that I recommend you use (here’s a list of ux560 accessories), labels the left channel as tip (black) and the right channel as ring (red). I recommend that you pick a scheme and stick to it for all of your interviews. That’s because it’ll become easy for you to glance at the ux560 and monitor interviewer and interviewee recordings; left or right.
What do you do if your recording levels are not at the -12dB level? Lower or increase the microphone sensitivity on the ux560 (here’s a great how to post – with video). I’ve found that the low microphone sensitivity setting works best with the giant squid microphones. Now, please note that the difference between the low and the medium mic settings is 12 dB (and 7 dB for medium-high). So if you are peak levels are at -18dB while using the low setting, changing the setting to medium will move your peak levels to -6dB. So only use the mic sensitivity setting if the difference between your peak levels and -12dB is high, above 9dB.
A few other tips on optimizing your sound levels. You do want to prioritize optimization on the interviewee’s channel. If you are recording the interviewee on the right channel, that’s the channel that you should focus on. Another tip is placing the clip-on microphone closer or further away from the interviewee’s mouth to increase or reduce your peak levels. Finally, adding or removing a windscreen or fluffy deadcat can increase or decrease your peak levels. But windscreens are primarily used to decrease background noise.
Using Headphones
Which segues nicely to using your headphones to monitor the sound quality of your recording. To reiterate, the meters on the ux560 are used to optimize sound levels. You should not use your headphones to monitor the loudness of the recording. That’s because you might have set a high or low volume for your headphone and what you hear might not be representative of the recording. The meters and dB revels are a very good representation of the loudness of the recording.
You use the headphones to monitor the tone/character of the recording. And for interviews, that boils down to listening to background noise. From looking at the meters, it’s hard to tell if there’s background noise or an echo in your recording. But using a pair of headphones, it’s easy to hear if the AC, wind noise et al are coming through into your recording and if they are masking your interviewee.
If there’s too much background noise, then there are a couple of things that you can do. The first one is to use a windshield/deadcat. They work very well at reducing background noise. Alternatively, you can move the clip-on microphone closer to the interviewee. That tends to increase the loudness of your interviewee and mask the background noise.
I’ve got questions about what type of headphones I’d recommend for monitoring sound quality. I like to use the Senal SMH-1000 to monitor my recordings. But they are bulky, so I rarely use them for 1-on-1 audio interviews. For that I use my phone’s earbuds. They are small, portable and more than adequate. So, any headphones will work. If possible, get a pair of studio monitor headphones, they are also great for transcription.
That’s it for this post on how to monitor the sound quality of your research interviews. Hope you’ve enjoyed it. If you have any questions, or need a clarification, post them in the comment section below. And as always, keep us in mind for all of your academic transcription needs.